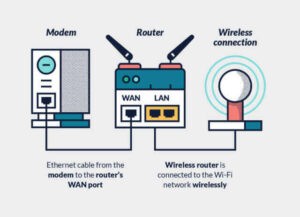
If you are familiar with VPNs, you may already be using one from your PC, your phone or your tablet and have it fully configured from there. One way to use a VPN is just that: configure it individually from each device you want to connect. But it is also possible to leave it installed directly on your router so that all the traffic on your network goes through the VPN without having to configure anything else on the other devices. Have a question like: how do i put a vpn on my router? Perfect! Now we will explain you how to install a VPN on a router.
What is a VPN?
A VPN is a virtual private network (Virtual Private Network) that allows a user to connect any of their devices to an external server in an encrypted form. When this connection is established, traffic between this user and the web is done entirely from this server. This has many advantages in terms of security, privacy and protection of devices, as well as enabling you to use an IP located in a country other than yours. That is why more and more people decide to redirect their connection through a VPN.
Why install the VPN router?

If you want to connect several devices at once to the same VPN, it is easier to leave it installed on the router and configure it only once. In this way, the rest of your devices – your PC or Mac, your phones, your tablet – will access your router’s network normally, without the need for any extra configuration, and will automatically connect to the VPN.
Can a VPN be installed on any router?
In most. It depends on the specifications of each router. For this article we have decided to work with the NordVPN VPN, which especially recommends ASUS routers, but also works very well with many other manufacturers. Here is a list of the routers recommended by NordVPN. Do you see yours in the list or do you have someone else that allows this type of configuration? Perfect! Then you can start the installation.
1. Access the router access page
The first thing you need to do to install the VPN is to access the configuration page of your router. You can do this from the web browser of your PC or Mac, as long as they are connected to your network via Wi-Fi or LAN cable. The specific address of your router varies depending on the manufacturer, although in most cases it is 192.168.0.1, 192.168.1.1 or 192.168.2.1. You will surely be asked for a password to access. If you have not customized it before, it is probably indicated below the device or simply admin. If you can’t get it, you can call your provider’s phone number and check it.
2. Access the VPN options
Have you got the password yet? Perfect. When you have accessed the router configuration options, look for the VPN configuration options. Again, its location varies depending on the manufacturer, although you can often find it in ‘Advanced Options’, as is the case with ASUS routers.
3. Enter your NordVPN data
Once you have reached the VPN options, enter your NordVPN server data, including your username and password. This information will be provided by NordVPN when you have registered for its services. If you don’t have an account with NordVPN yet, you can make one on their website.
4. Configure the OpenVPN of the server you want to use
Next you will need to download the OpenVPN configuration files corresponding to the server you have chosen. OpenVPN is an open source software designed for VPNs that facilitates its configuration for different companies. In the specific case of NordVPN, you can access its OpenVPN files from this link. You must install them by uploading the corresponding .ovpn file in the tab that will indicate your router from its VPN configuration menu.
5. Configure NordVPN DNS servers
When you have done this, it is time to access the WAN section of the router configuration and enter the DNS servers of your VPN. In the case of NordVPN, the servers are usually 103.86.96.100 and 103.8699.100, but if you need to know their addresses more up-to-date you can check them on the NordVPN website.
6. Activate your VPN
If you have followed all these steps, now you should have everything almost ready. If you return to the VPN configuration tab of your router, you will find a new VPN at your disposal that you can activate. As soon as you do, you will have your VPN running and all traffic between your router and the web will be passing through the NordVPN encrypted server. And, if at any time you want to deactivate it, you just need to access this menu again and do it.
Still have any questions?
You may have had problems at some step or questions that you have not been able to solve at all. Do not worry! There are always resources to help you solve it.
If you have had problems finding the VPN configuration menu of your router you can consult its instruction manual or access the manufacturer’s website. In the case of ASUS they also have an excellent Online Assistance service that will not hesitate to help you in everything you need.
If you are missing data about your NordVPN account or your VPN configuration options, you also have a Help Center that will be happy to give you a hand to answer any questions you may have. In parallel, the tutorials that NordVPN puts at your disposal to configure your VPN can also help you.
Finally, if you have had any difficulty installing the OpenVPN files, you have this extensive support panel where you can consult the most frequent questions that may arise. And, if your question does not appear in the list, you can also request a ticket to contact their support service directly.